Role Management
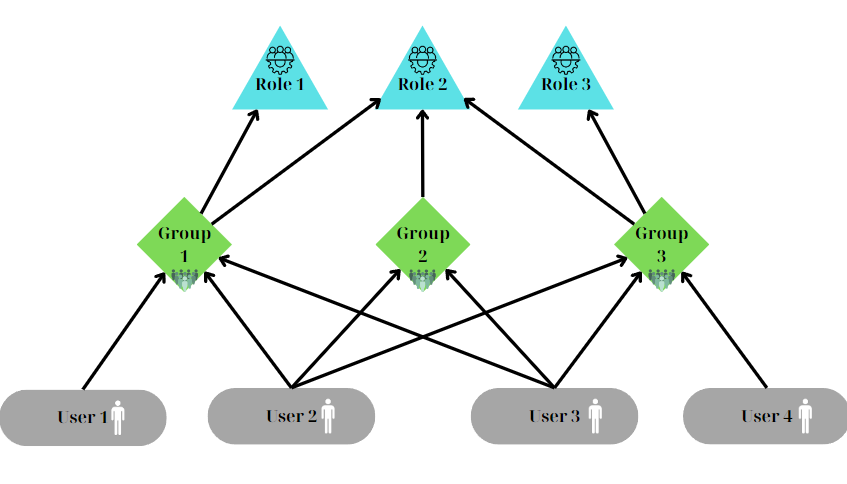
Role Management is designated for controlling access to various functionality and widgets of the application. There are three main entities in the Management system: Users, Roles, and Groups. Relations between Users←→ ←→ Groups←→ ←→ Roles are “many-to-many”. So one User can be a member of one, two or more Groups. And Group can be connected to one, two or more Roles.
Users page
Represent all users that are created for corresponding groups. Each user can belong to one or more groups. The Add User button allows to create a new user.
Field Name | Description | Visualization |
|---|---|---|
Name |
|
|
Key |
| |
Group |
| |
User Search |
|
|
Table |
|
|
Save |
|
|
.png "image(97).png")
.png "image(98).png")
.png "image(99).png")
Example of the created User entity in the Studio:
.png "image(100).png")
Groups page
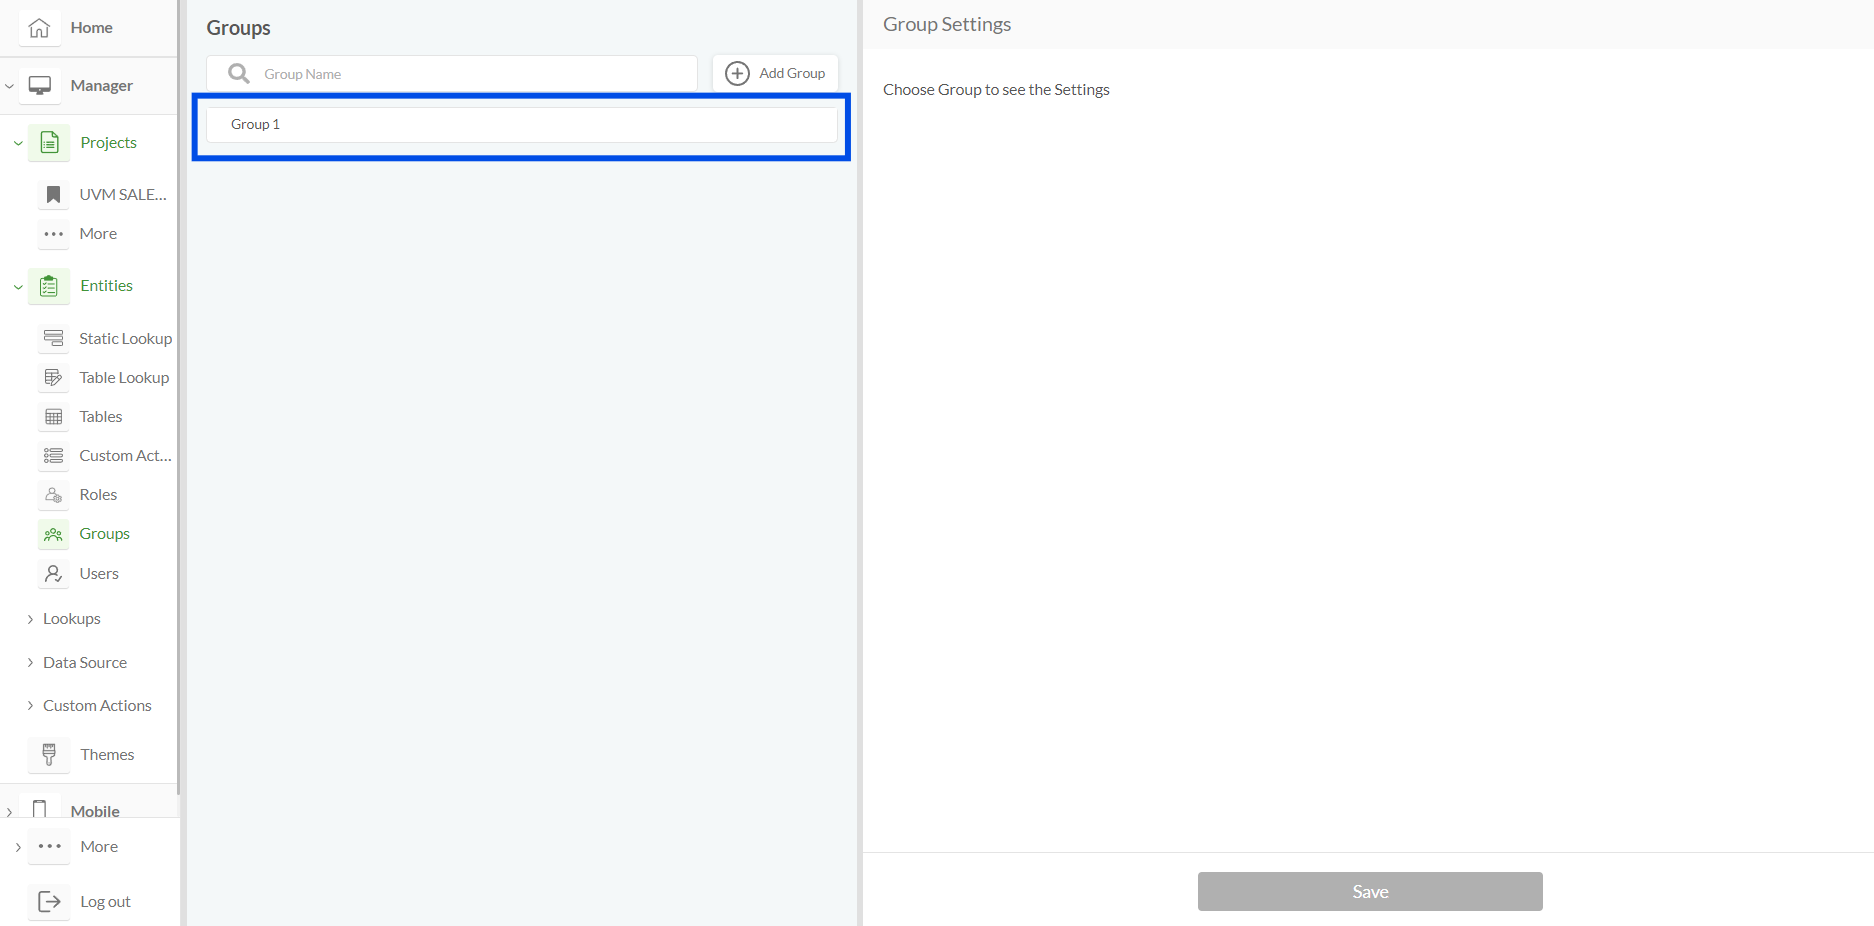
Represent all groups that are created for corresponding Roles. Groups are collections of users. Can be associated with one or more roles. The Add Group button allows to create a new group.
Field Name | Description | Visualization |
|---|---|---|
Name |
|
|
Description |
| |
Users |
|
|
Save |
|
|
.png "image(102).png")
.png "image(103).png")
.png "image(104).png")
Example of the created Group entity in the Studio:
Roles page
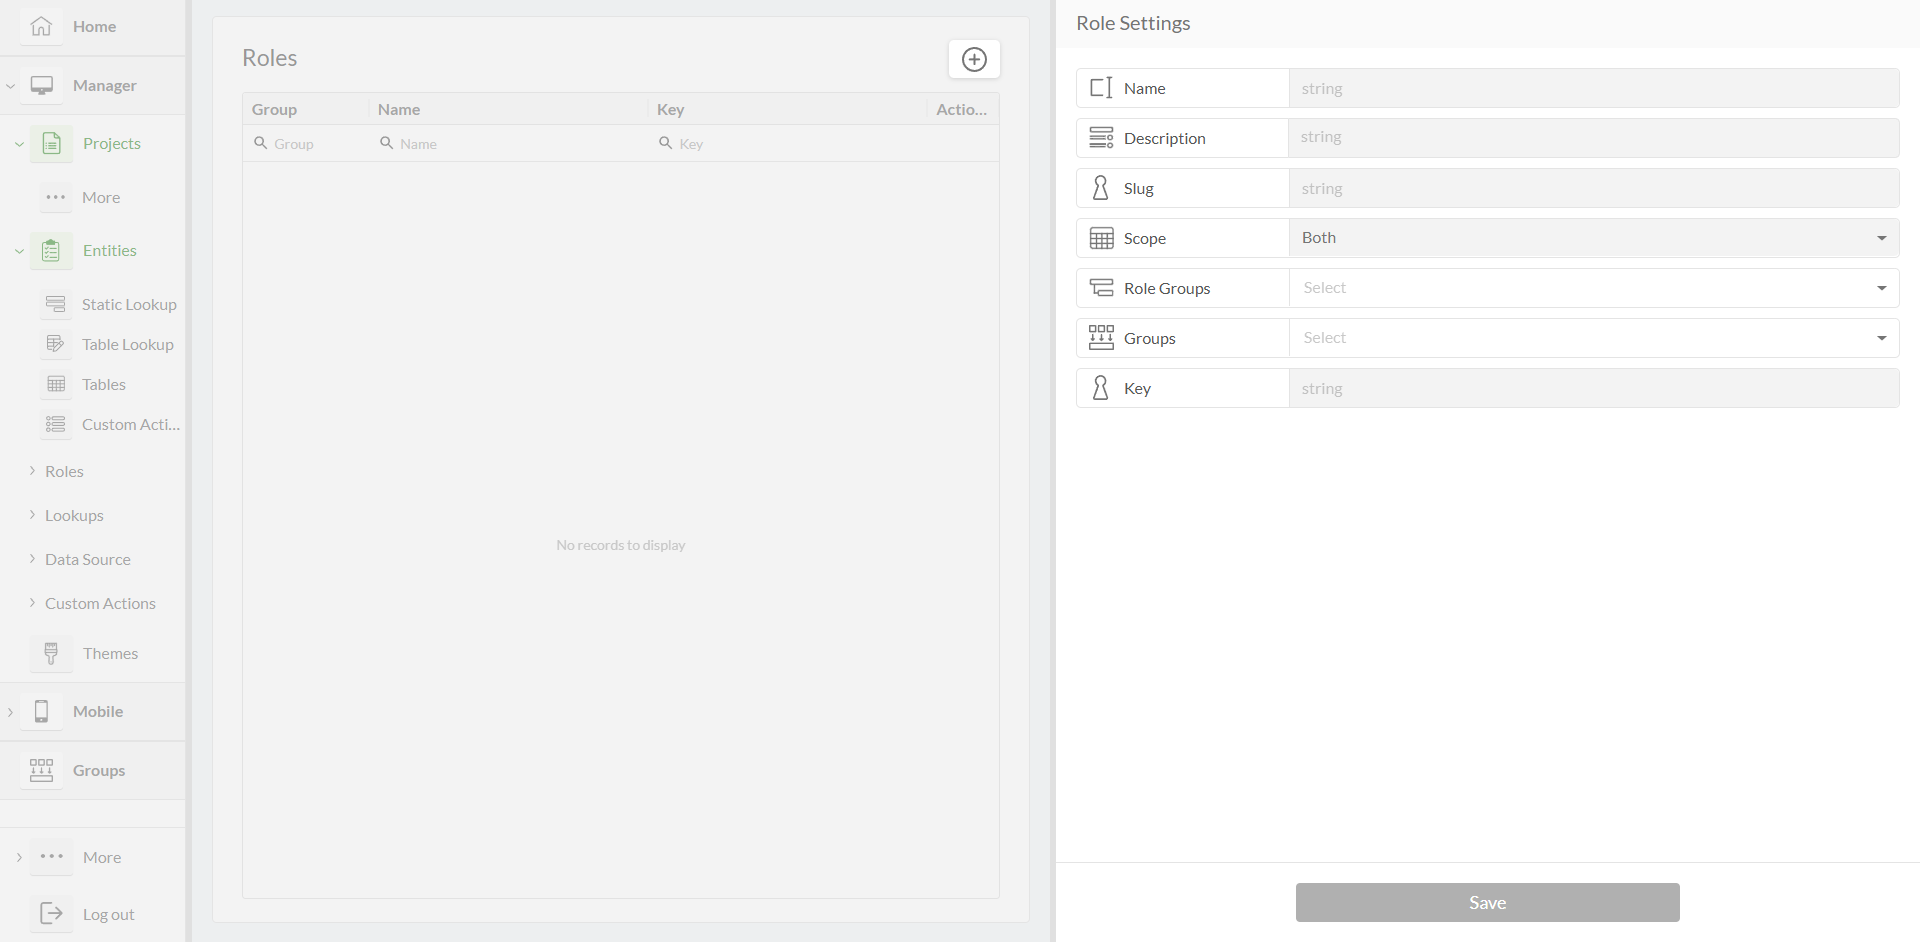
Represent all roles that are created for the particular Clearion product. Roles define specific permissions and rights in the system to control access to various functionalities and widgets of the application. The Add Role button allows to create a new role.
Field Name | Description | Visualization |
|---|---|---|
Name |
|
|
Description |
|
|
Slug |
|
|
Scope |
|
|
Groups |
|
|
Save |
|
|
.png "image(106).png")
.png "image(107).png")
.png "image(108).png")
.png "image(105).png")
.png "image(109).png")
.png "image(110).png")
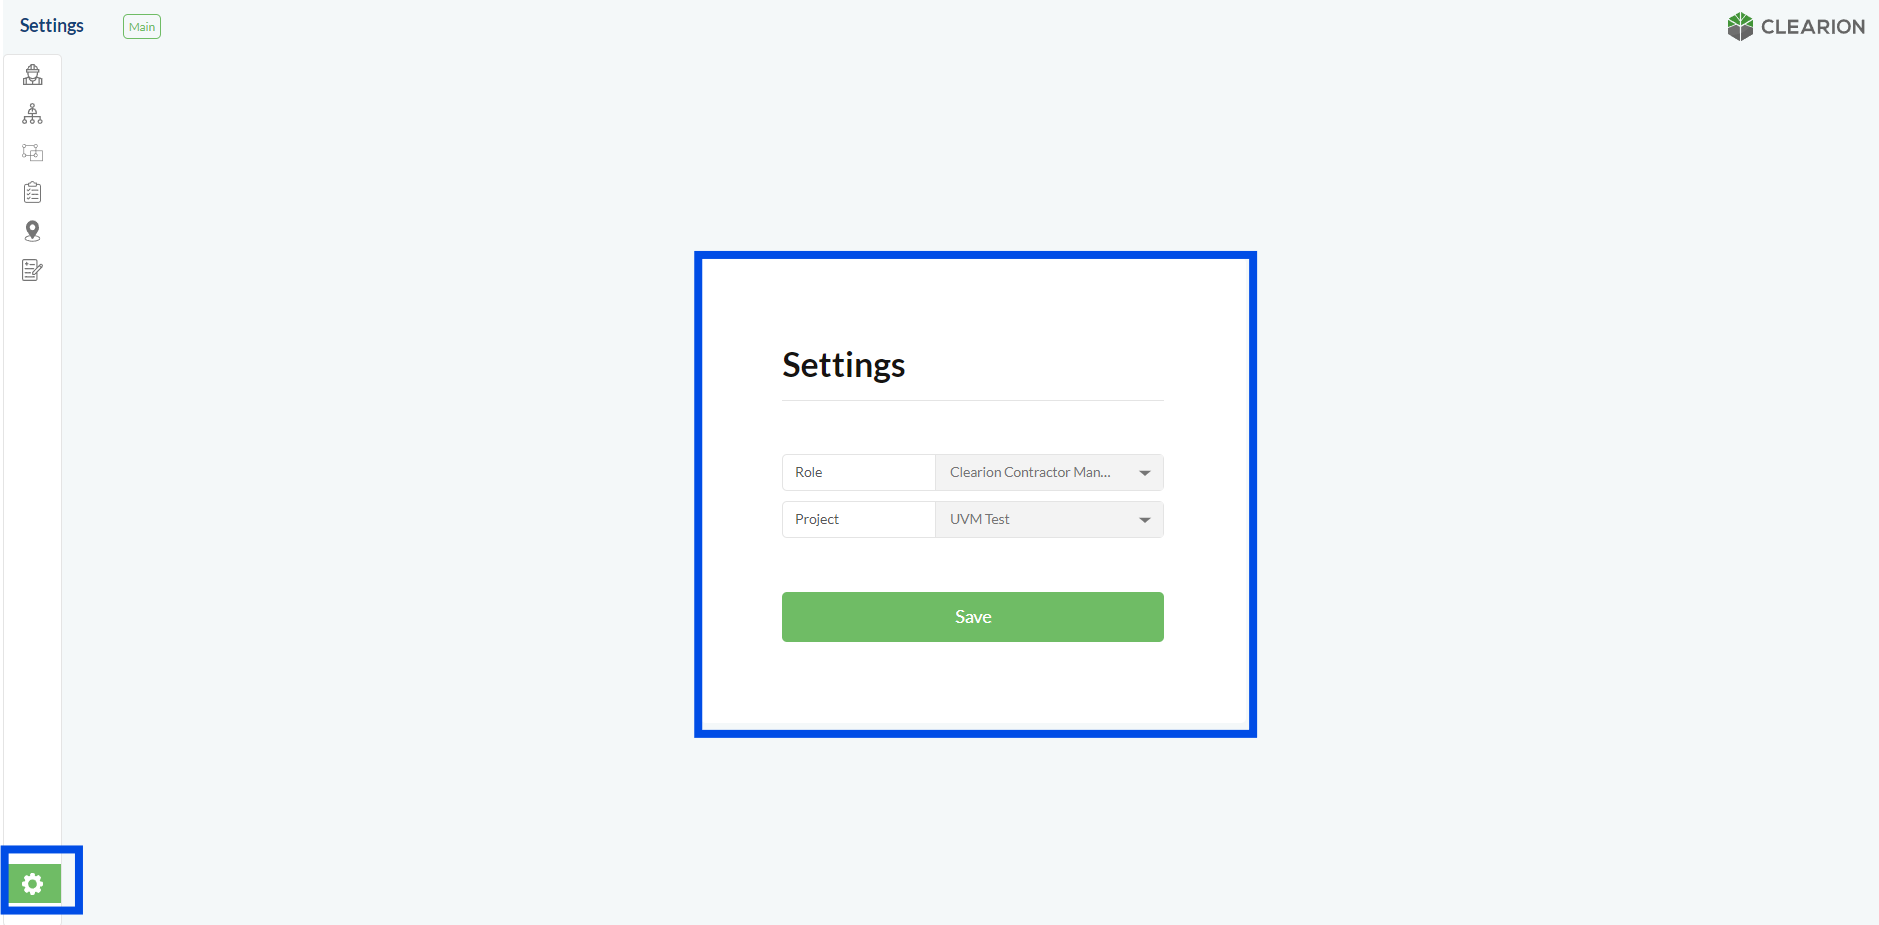
Roles Settings
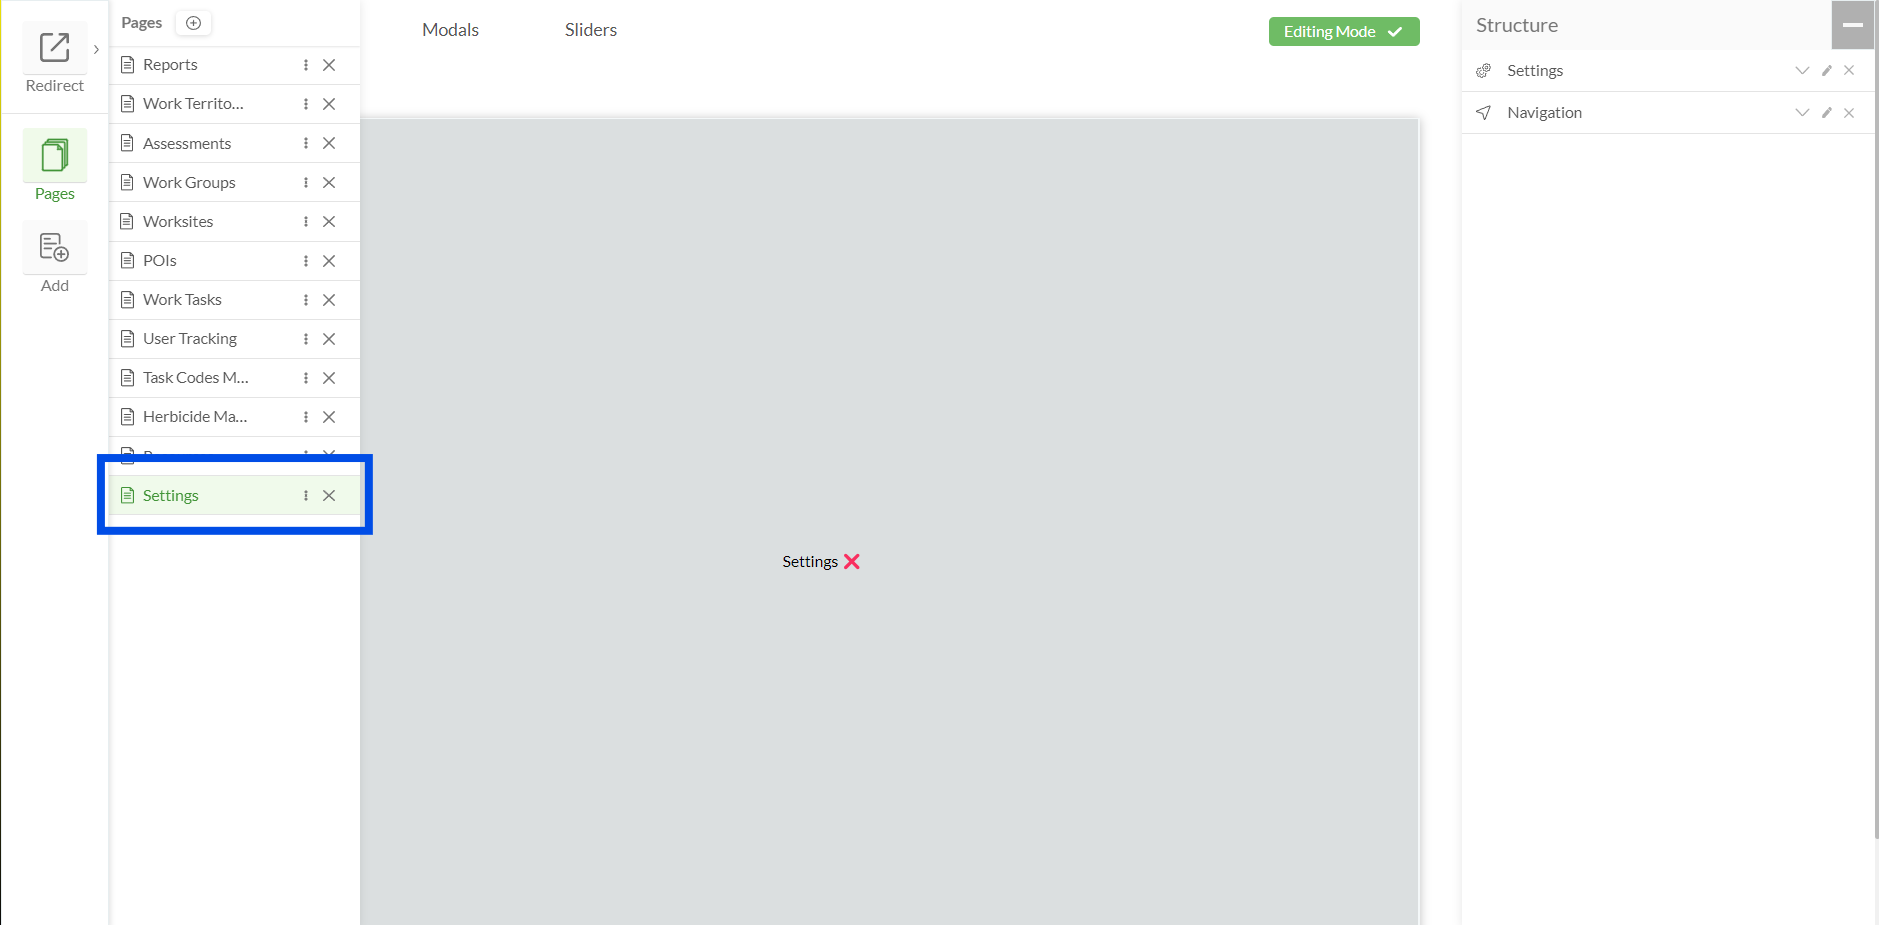
When all users are assigned to corresponding groups and roles, we need to configure an additional “Settings” widget, which should be added as a separate panel in the configuration. Navigation to the Settings panel in the web project allows to change the current role if those roles are configured for the current user. E.g. if a user added to only one Role, this user will see only one option in the Settings drop-down. And if user is added to several roles, there will be more items in the drop-down.
Example of the created Settings panel in the Studio:
Example of the created Settings panel in the Web Project:
Example of the created Role entity in the Studio:
.png "image(111).png")
Roles Configuration Per Widget
Roles configuration is available for the following widgets:
Embedded Widget
Work Task Summary